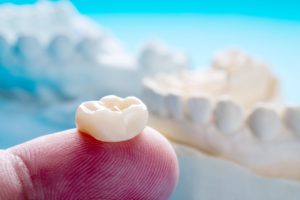
If you have a severely broken or decayed tooth, your dentist may recommend a dental crown to restore and protect it. These hard caps are usually made of durable porcelain and are customized to fit over the damaged tooth. They are often used in cases when the tooth is cracked, broken, or has sustained too much decay for a filling to be effective.
Though this is a popular treatment option, many patients may not be aware of what’s involved in the process. Continue reading to learn about 7 steps your dentist will take to prepare your teeth for dental crowns.
Step 1: Examination
First, your dentist will need to thoroughly examine your tooth to determine the extent of the damage. They may take X-rays to get a comprehensive look not only of the tooth, but also its roots and the surrounding bone structure.
Step 2: Making You Comfortable
Next your dentist will numb the area with a local anesthetic to ensure you don’t feel any discomfort or sensitivity during your appointment. If you are particularly worried, feel free to ask your dentist about what sedation options are available to you.
Step 3: Removing Decay
Once you’re comfortable, your dentist will remove decay or injured enamel. Once these spaces are empty, sanitized, and germ-free, your dentist will fill them with a material called gutta-percha.
Step 4: Reshaping
After clearing your tooth, your dentist also needs to reshape it so the crown can be placed. A poorly fitting crown can result in a misaligned bite over time, which can wear down the enamel of your teeth or lead to a tender jaw. Your dentist wants to make sure the cap can be placed and will bond exactly as intended.
Step 5: Making An Impression
Next, it’s time for your dentist to take an impression of your tooth. Typically, this consists of biting into a U-shaped tray that is filled with a molding material that forms to the shape of your teeth. Then it hardens and is sent to the lab. Using this information they can custom-build a crown specifically to fit your tooth.
Step 6: Temporary Crown Placement
Your dentist will likely provide a temporary crown to wear until yours arrives. This acts as a shield now that some of the protective enamel has been removed. You’ll want to be careful what you eat with this in place. Though these temporary crowns do safeguard your vulnerable tooth, they are more fragile because they don’t have the exact right fit and aren’t intended to be in place for long.
Step 7: Final Crown Placement
After these preparations, your next visit will be to install your new, permanent dental crowns! To do this, your dentist places a layer of dental cement onto the inside of the crown and then carefully fits it over the damaged tooth. Once situated, any excess cement will be removed resulting in a flawless finish.
Now that your dental crown is in place, you can walk away knowing that your pearly whites are protected for decades to come!
About the Author
Dr. Gary C. Nawrocki brings four decades of experience to every treatment he provides! He initially earned his Doctorate in Dentistry from the University of Florida in 1980 and has completed thousands of hours of continuing education since then. He takes pride in helping patients alleviate pain or restore their smile so that they can look and feel their best. If you have a damaged tooth and would like to inquire about dental crowns, you are welcome to contact the office on the website or call (321) 783-7514.
